



The Quick Answer
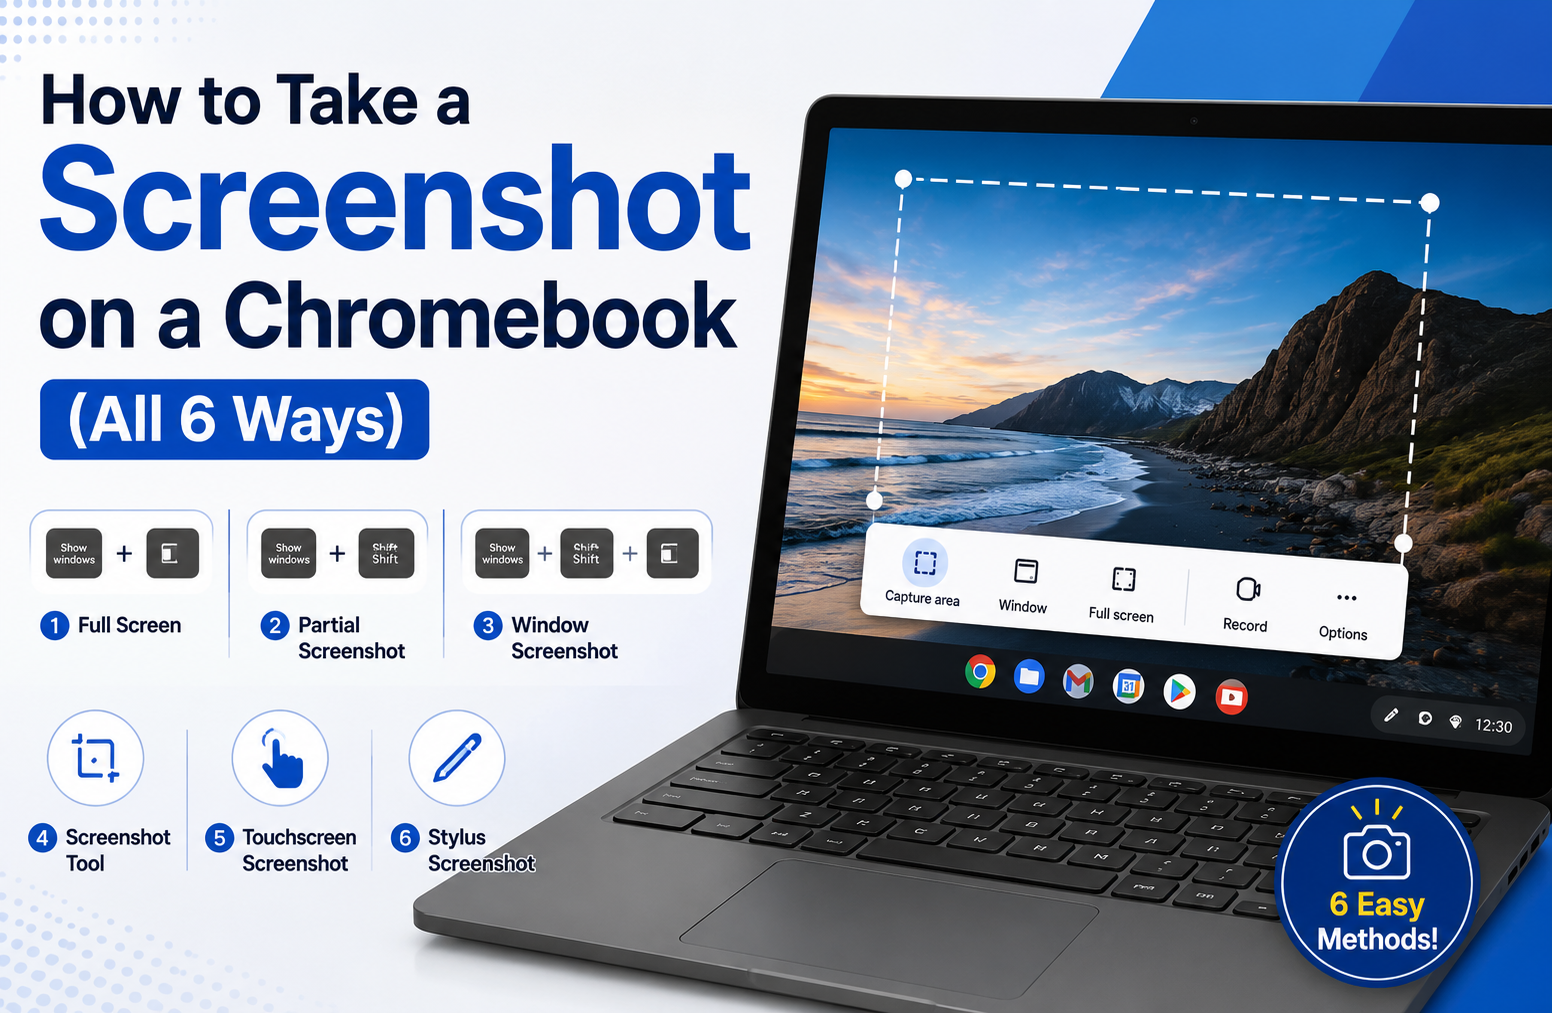
To take a screenshot on a Chromebook, press Ctrl + Show windows. That captures the entire screen and saves it straight to your Downloads folder.
The Show windows key sits in the top row where the F5 key would be on a Windows keyboard. Its icon is a rectangle followed by two lines — like windows stacked behind one another. On Chromebooks made since roughly 2023 you may instead have a dedicated Screenshot key in that top row, which does the same job in one press.
If you want only part of the screen, a single window, or a screen recording, press Ctrl + Shift + Show windows instead. That opens the Screen capture toolbar, where you pick what to grab.
Every Chromebook screenshot shortcut
| What you want | Press this | Result |
|---|---|---|
| Whole screen | Ctrl + Show windows | Captures immediately |
| Open the capture toolbar | Ctrl + Shift + Show windows | Choose full, partial, or window |
| Part of the screen | Toolbar → partial, then drag | Captures your selection |
| One window only | Toolbar → window, then click it | Captures that window |
| External keyboard | Ctrl + Shift + F5 | Opens the same toolbar |
| Tablet mode, no keyboard | Power + Volume down | Captures immediately |
| Screen recording | Toolbar → camcorder icon | Records to a video file |
Everything below explains each of these properly, including where the files go and what to do when a shortcut does nothing.
First, find the Show windows key
Almost every Chromebook screenshot problem comes down to one thing: people look for a PrtScn key. Chromebooks do not have one, and they never have.
What they have instead is the Show windows key — sometimes called the Overview key. Look along the top row of your keyboard, in the position where a Windows laptop puts F5. The icon is a rectangle with two short vertical lines to its right, meant to suggest several windows overlapping.
Press it on its own and you will see every open window shrink into a grid. That is the same key you combine with Ctrl to take a screenshot.
Newer Chromebooks changed this. Since around 2023, many models ship with a dedicated Screenshot key in the top row, marked with a small camera-style icon. If yours has one, a single press opens the capture toolbar and you can skip the key combinations entirely.
How to capture the whole screen
This is the one most people want, and it is a single shortcut.
- Set up the screen exactly as you want it captured. The screenshot fires instantly, so there is no delay to work with.
- Press Ctrl + Show windows.
- The screen flashes and a notification appears in the bottom-right corner showing a preview.
The file is already saved. You do not need to paste it anywhere or open an editor — unlike Windows, where the Print Screen key only copies to the clipboard. This trips up people switching from a PC and is worth knowing on day one.
Click the notification to open the image straight away, or find it later in Files → Downloads.
How to capture part of the screen
Cropping afterwards wastes time. Capture only what you need instead.
- Press Ctrl + Shift + Show windows. A small toolbar appears at the bottom of the screen and the display dims slightly.
- Make sure the camera icon is selected rather than the camcorder icon — the camera takes stills, the camcorder records video.
- Choose the partial screenshot option, which is the middle of the three shape icons.
- Click and drag a rectangle over the area you want.
- Release the mouse or trackpad. The capture happens the moment you let go.
Adjusting the selection precisely
Dragging with a trackpad is imprecise, and most people do not know ChromeOS gives you keyboard control over the selection box before you commit to it:
- Spacebar — moves the whole selection box without resizing it
- Up and Down arrows — change the height
- Left and Right arrows — change the width
This matters when you are documenting something that needs exact framing, such as an error message or a table of figures.
How to capture a single window
If you want one application and nothing else — no desktop, no other tabs, no shelf — capture the window directly.
- Press Ctrl + Shift + Show windows.
- Choose the window screenshot option, the third of the three shape icons.
- Move your cursor over the window you want. It highlights as you hover.
- Click it.
The result is a clean capture of that window alone, correctly cropped to its edges. This is the option to use when you are writing instructions for someone else, because it removes everything irrelevant without any editing.
Using an external keyboard
Plug a standard Windows or Mac keyboard into a Chromebook and the Show windows key disappears, because that keyboard does not have one. ChromeOS maps the function to F5 instead, since that is the same physical position.
- Ctrl + Shift + F5 — opens the Screen capture toolbar. This is the combination Google documents.
- Ctrl + F5 — captures the full screen immediately, following the same pattern as the built-in key.
On some external keyboards the function row is locked to media controls by default. If F5 adjusts brightness or volume rather than taking a screenshot, hold the Fn key as well, or turn off the media-key behaviour in Settings → Device → Keyboard.
Chromebook tablets and detachables
If your Chromebook is a tablet, or a detachable with the keyboard removed, there are no keys to press. Use the physical buttons instead:
Press Power + Volume down together.
The timing is the same as on an Android phone: press both at once and release. Hold them too long and you will get the power menu instead of a screenshot. If that happens, dismiss the menu and try again with a quicker press.
There is also a menu route that works in any mode, keyboard or not. Select the time in the bottom-right corner to open Quick Settings, then choose Screen capture. This opens the same toolbar as the keyboard shortcut and is the most reliable option if a key is broken or a shortcut has been disabled by an administrator.
Recording your screen instead
The same toolbar records video, which is useful when a still image cannot show what you mean — a stutter, an animation, or a sequence of steps.
- Press Ctrl + Shift + Show windows.
- Select the camcorder icon on the left of the toolbar to switch from screenshot to recording.
- Choose full screen, partial, or window, exactly as you would for a screenshot.
- Recording begins after a short countdown. A red stop button appears in the shelf.
- Select the stop button when you are finished.
Recordings land in the same Downloads folder as screenshots. They are saved as video files, and a long recording produces a large file — worth remembering on a Chromebook with 32 GB of storage, where a handful of recordings can fill the drive faster than you expect.
If you are recording something where smoothness matters, be aware that capture itself consumes resources. Our explainer on what latency is covers why a recording can look choppier than what you actually saw on screen.
Where Chromebook screenshots are saved
Screenshots and recordings both go to the Downloads folder by default. Open the Files app and you will find them there, named by date and time.
Two things about this catch people out:
Downloads is local, not Drive. On ChromeOS the Downloads folder lives on the device itself, not in Google Drive. Powerwash the Chromebook and those files are gone. If a screenshot matters, drag it into Google Drive, or change the default in Settings → Downloads.
Storage fills up quietly. Chromebooks often ship with small drives, and screenshots accumulate invisibly because nothing prompts you to name or file them. If you take screenshots as part of your work rather than occasionally, it is worth applying some structure to them — the principles in our guide to digital asset management apply just as well to a Downloads folder as to a corporate library.
Recent captures also appear in Tote, the small preview area in the shelf beside the clock, which gives you quick access to the last few files without opening the Files app at all.
When the shortcut does not work
Work through these in order.
Nothing happens at all
Check that you are pressing the Show windows key and not F5 or the full-screen key next to it. The full-screen key is a plain empty rectangle; Show windows has the two lines beside it. Confusing the two is by far the most common cause.
You get the power menu instead
On a tablet, you are holding the buttons too long. Press and release quickly rather than holding.
The keyboard shortcut is blocked
School and workplace Chromebooks are frequently managed, and administrators can disable screen capture entirely through policy. If the toolbar never appears and Quick Settings → Screen capture is missing or greyed out, this is almost certainly why, and no key combination will get around it. That restriction is deliberate and needs to be lifted by whoever manages the device.
Screenshots save but you cannot find them
Open the Files app and check whether the default save location has been changed under Settings → Downloads. If the Chromebook is shared, another user may have pointed it at a different folder.
You are in an Android or Linux app
ChromeOS runs Android apps, and a few of them — banking apps especially — block screenshots for security reasons. The screen will either capture as black or refuse outright. This is enforced by the app, not by ChromeOS, and cannot be overridden. Android’s own screenshot behaviour differs slightly from ChromeOS, which our coverage of the Android 16 Nothing OS 4.0 rollout touches on.
What to do with the screenshot afterwards
ChromeOS gives you a few useful options the moment a capture completes.
The notification that appears in the corner has an Edit button, which opens the image in the built-in Gallery app. From there you can crop, rotate, annotate, and adjust brightness without installing anything. For most purposes this is enough, and it is faster than opening a web editor.
Screenshots are copied to the clipboard as well as saved, so you can paste one directly into a document or chat with Ctrl + V immediately after capturing.
If you are embedding a screenshot into a web page or an email template, you may need it as text rather than a file — a Base64 code converter turns the image into a string you can drop straight into HTML or CSS.
Because ChromeOS is built around the browser, most of what you do with a screenshot afterwards happens in a web application rather than installed software. That is a genuine strength of the platform for this kind of task: there is nothing to install, and the tools work identically on any Chromebook you sign into. If screenshots are part of a repeatable workflow, some of the AI tools for productivity we have reviewed can handle the labelling and transcription that usually follows.
Frequently asked questions
What is the screenshot key on a Chromebook?
There is no single screenshot key on most Chromebooks. Press Ctrl + Show windows, where Show windows is the top-row key with a rectangle-and-lines icon. Chromebooks released since about 2023 may have a dedicated Screenshot key in the top row instead.
Why is there no Print Screen key on a Chromebook?
Chromebook keyboards were designed around web browsing rather than the traditional PC layout, so the function row was replaced with browser and system controls. The screenshot function moved to Ctrl + Show windows. If you use an external Windows keyboard, its Print Screen key will not work, but Ctrl + Shift + F5 will.
Where do Chromebook screenshots go?
To the Downloads folder, which you can open through the Files app. Downloads is stored locally on the Chromebook rather than in Google Drive, so the files are lost if the device is powerwashed. You can change the default location in Settings → Downloads.
How do I take a screenshot on a Chromebook without the Show windows key?
Use Ctrl + Shift + F5 on an external keyboard, press Power + Volume down in tablet mode, or open Quick Settings by selecting the time and choosing Screen capture. The last option needs no keyboard at all.
Can I take a scrolling screenshot on a Chromebook?
ChromeOS has no built-in scrolling or full-page screenshot tool. To capture a long web page, use a Chrome extension built for the purpose, or print the page to PDF with Ctrl + P and choose Save as PDF, which preserves the entire page in one file.
Why is my Chromebook screenshot black?
An app is blocking the capture. Android apps that handle payments, banking, or DRM-protected video deliberately prevent screenshots and will produce a black image. The app enforces this, so there is no ChromeOS setting that overrides it.
How do I screenshot on a school Chromebook?
The standard shortcuts work unless your school has disabled them by policy. If the capture toolbar will not open and Screen capture is missing from Quick Settings, the feature has been turned off centrally and only an administrator can restore it.
Does a Chromebook screenshot include the mouse cursor?
No. ChromeOS excludes the pointer from screenshots, which is usually what you want but is a problem if you are documenting where to click. To show a cursor position you will need to add an arrow yourself in the Gallery app’s annotation tools.
Related guides
This page is part of our wider guide on how to take a screenshot on any device, which covers Windows, Mac, Linux, Android, and iPhone. If you are switching between machines, our iPad screenshot guide covers the button combinations and full-page captures on iPadOS.
Keyboard shortcuts causing trouble more generally? Sticky Keys is the accessibility feature most likely to interfere with multi-key combinations, and it is easy to enable by accident.


